Of course, in order to do so, data transfer between Windows 7 PCs and Windows 10 PCs needs to be possible. Fortunately enough, pretty much every option you can think of that involves data transfer exists. This includes sending and receiving files via a cable. In order to proceed, you will need the following:
A Windows 7 PC or Laptop A Windows 10 PC or Laptop An Ethernet cable (the better the cable, the faster the transfer speeds will be)
How do I transfer files between PCs using an ethernet cable?
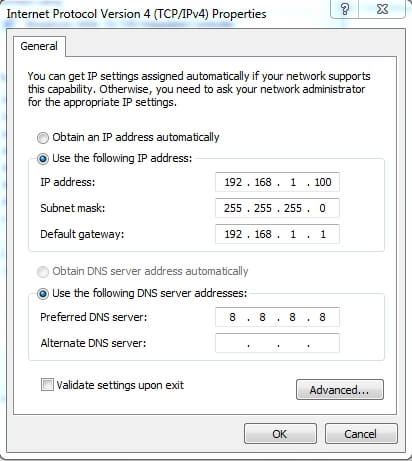
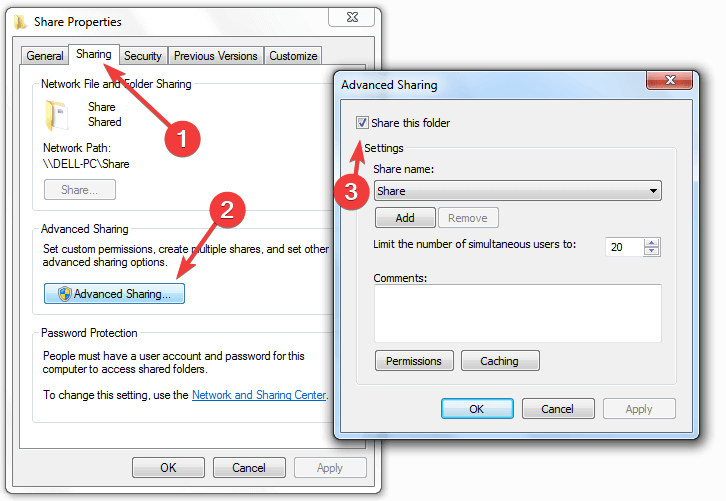
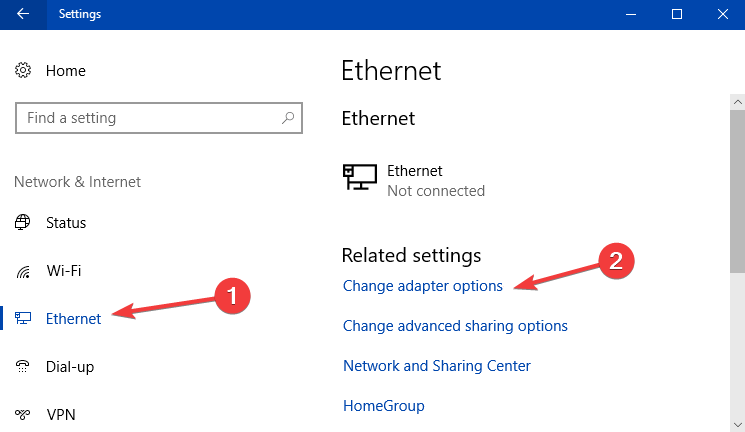
Once you’ve connected the two PCs via the Ethernet crossover cable, you will need to configure the subnet masks and select what folders that can be shared.
1. Configure the Windows 7 PC
2. Define what files can be shared
3. Configure the Windows 10 PC
Once you’ve set up the Windows 10 PC as well, you can visit the Network window from File Explorer, and the connection with the Windows 7 PC should appear there. Double-click it, and all the files and folders that were shared will be at your disposal. Did you think sharing data via the ethernet cable is efficient? Let us know in the comment section below. RELATED ARTICLES YOU SHOULD CHECK OUT:
How to upgrade a domain-joined PC from Windows 7 to 10 How to upgrade Windows 7 to Windows 10 on Bootcamp Fix: Windows 7 to Windows 10 sharing problems
Name *
Email *
Commenting as . Not you?
Save information for future comments
Comment
Δ


![]()